
How to EQ Live Vocals Without Feedback: A Practical Guide
Aug 10, 2026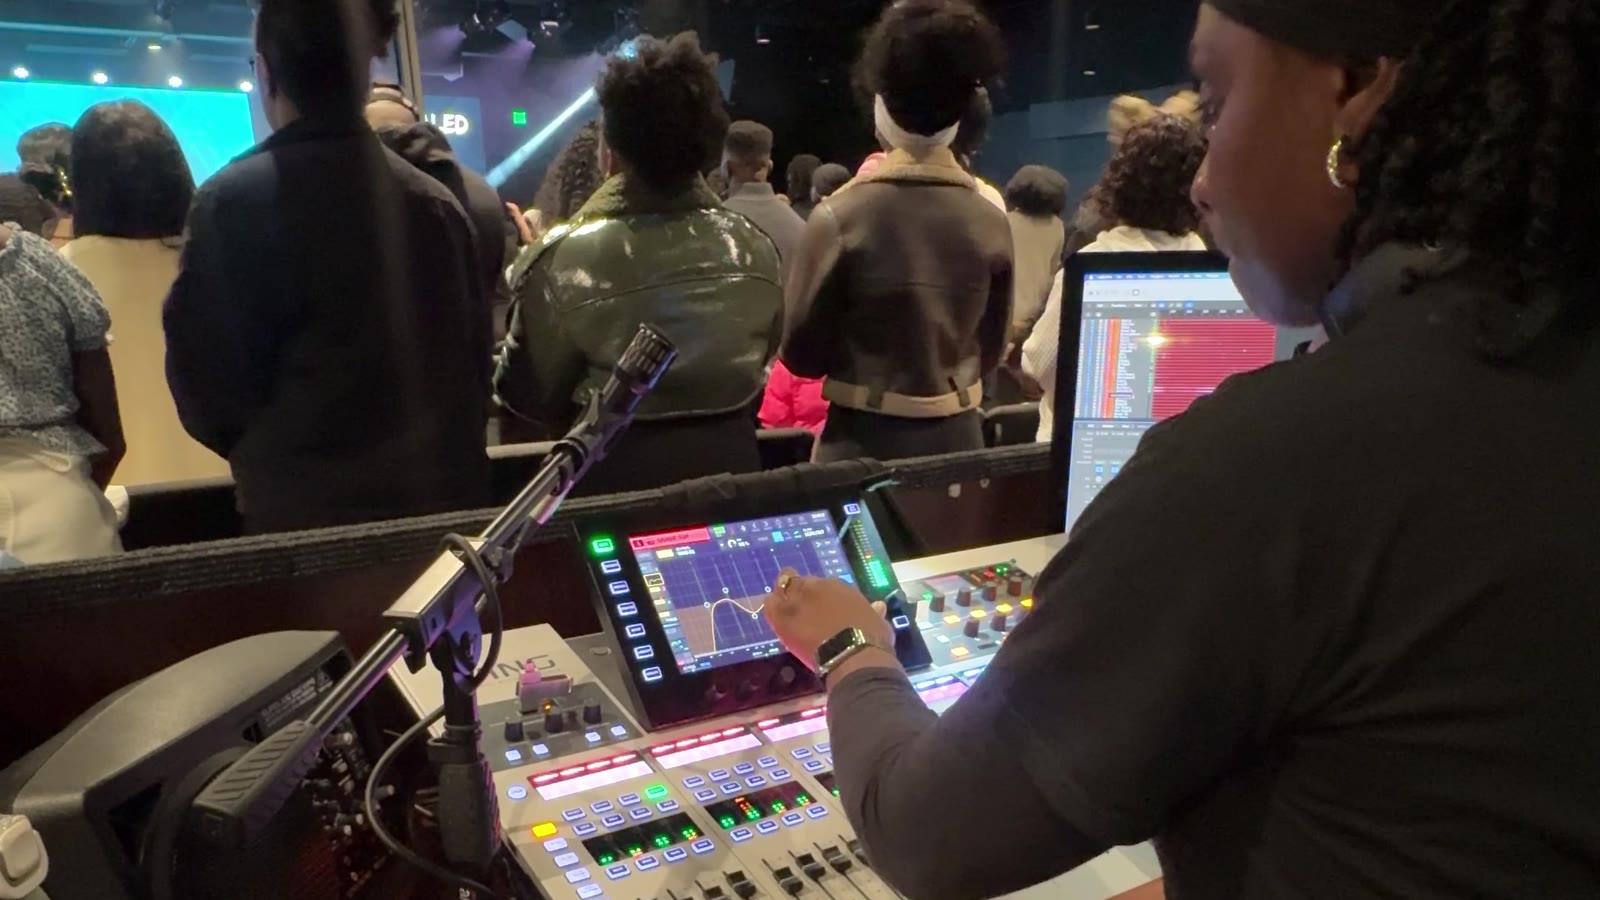
By Tobi Mark
Quick answer: To EQ a live vocal without creating more feedback, fix microphone and loudspeaker placement first, set gain at a realistic performance level, use a high-pass filter only as high as the voice allows, make small subtractive EQ moves, and correct feedback in the loudspeaker path that is actually ringing.
Getting a live vocal clear and loud without feedback starts before you touch the EQ. Microphone technique, loudspeaker placement, monitor level, gain structure, and the number of open microphones all affect how much level the system can produce before it rings.
The practical process is simple: fix the physical setup first, set gain with the singer performing at a realistic level, remove unnecessary low frequencies, make small cuts where the vocal sounds muddy or harsh, and use narrow system-level cuts only when a specific frequency is feeding back.
I will also walk you through two methods I use in real systems: ringing out an X32 stage-monitor bus with graphic EQ and separating one WING headset source into independent stage and front-of-house channels.
There is no universal vocal preset. The singer, microphone, room, PA, monitors, and stage volume change the correct settings every time.
What this guide will help you do
- Diagnose whether the problem starts with placement, gain, tone, or a specific loudspeaker mix.
- EQ the vocal without relying on a copied preset.
- Ring out an X32 stage-monitor bus with a graphic EQ and RTA.
- Split one WING headset source into separate stage and audience channels.
- Know when to stop cutting EQ and revisit the physical system.
Why live vocal feedback happens
Feedback occurs when sound from a loudspeaker reaches a microphone, travels through the sound system, comes out of the loudspeaker again, and continues looping. When the loop has enough gain at a resonant frequency, you hear ringing, howling, or a sharp squeal.
That means feedback is a system problem, not just an EQ problem. Microphone choice, microphone and loudspeaker placement, room acoustics, open microphones, and equalization all affect the available gain before feedback.
EQ can help, but it cannot rescue a poor physical setup without a cost to tone and clarity.
Step 1: Fix the physical setup first
Before adjusting gain or EQ, check the relationship between the vocalist, microphone, stage monitors, and main loudspeakers.
- Keep the microphone close to the singer's mouth.
- Keep the microphone behind the main PA whenever the room allows it.
- Aim the monitor toward the microphone's area of greatest rejection.
- Reduce unnecessary stage volume.
- Mute microphones that are not being used.
Close microphone placement is one of the most important ways to improve gain before feedback. Moving the microphone farther from the singer forces you to add more gain, which also amplifies more stage sound and loudspeaker spill.
Microphone polar pattern matters too. Cardioid and supercardioid microphones reject sound in different directions, so the best monitor position depends on the actual microphone being used. A cardioid microphone such as the Shure SM58 has its strongest rejection directly behind the microphone. A supercardioid microphone such as the sE Electronics V7 has a small rear pickup lobe, so placing a wedge directly behind it can work against you. Use the microphone's polar-pattern diagram and aim the monitor toward its rear-side rejection area.
Here are practical wired and wireless options I recommend:
- Wired cardioid: Shure SM58.
- Wired supercardioid: sE Electronics V7.
- Wireless cardioid: Shure SLX-D+ with an SM58 capsule. The linked G57 version is one frequency-band option, not a universal choice. Coordinate frequencies for your location before buying any wireless system.
- Wireless supercardioid upgrade: The SLXD2 handheld transmitter uses interchangeable microphone capsules. You can replace its SM58 capsule with the sE Electronics V7 MC1 supercardioid capsule. The MC1 is the Shure-compatible version; the MC2 is for Sennheiser transmitters.
Affiliate disclosure: Some product links above are affiliate links. I may earn a commission if you purchase through them, at no extra cost to you.
Step 2: Set input gain at a realistic performance level
Ask the singer to perform the loudest part of the song at the level they will actually use during the service or event. Set the preamp so the signal is healthy and consistent without clipping.
Do not set gain while the singer is speaking quietly and then assume it will work when the band starts. Quiet soundchecks often lead to rushed gain changes later, and those changes affect the monitor mixes as well as the front-of-house mix.
The exact meter target depends on the console and its metering scale. The goal is useful signal level with comfortable headroom, not one number copied from another system.
After setting gain, listen through the PA and the relevant monitor mix. A vocal that looks correct on the meter can still sound unstable because the acoustic loop exists in the room, not on the meter.
Step 3: Use the high-pass filter to remove unnecessary low frequencies
Most live vocal microphones capture low-frequency energy that does not help the vocal. Handling noise, footsteps, stage vibration, wind, and proximity effect can all create low-end buildup.
Start the high-pass filter low, then raise it slowly while the singer performs. Stop when the unwanted low-frequency energy is controlled but the voice still has the body it needs. If the vocal becomes thin, move the filter back down.
For many handheld vocals, somewhere around 80 to 120 Hz can be a useful area to begin listening, but it is not a rule. A deep voice, a thin microphone, or a PA with limited low-frequency extension may need a different setting.
The filter should solve a real problem. Do not raise it simply because a preset tells you to.
Step 4: Cut problems before boosting what you want
Once the low end is under control, listen for the vocal's biggest tonal problem.
Common areas to investigate include:
- Low-mid buildup: often perceived as muddy, thick, or cloudy.
- Midrange buildup: often perceived as boxy, hollow, or nasal.
- Upper-mid buildup: often perceived as harsh, piercing, or tiring.
- Excess high frequency: often perceived as brittle or overly sibilant.
These descriptions overlap, and the exact frequency changes with every voice, microphone, and room. Use them as listening clues, not fixed frequency assignments.
Choose one EQ band, use a moderate boost temporarily to locate the problem, then return the band to zero and apply a small cut. Compare the result with the EQ band bypassed. If the vocal is not clearly better, remove the cut.
Avoid sweeping a large boost while the system is already close to feedback. Keep the test controlled, move slowly, and lower the channel temporarily if necessary.
If you want a beginner-friendly walkthrough of frequency ranges, filters, Q, gain structure, and how to make EQ decisions by ear, use my EQ Made Simple E-book. It is designed to help you understand why an EQ move works instead of giving you a preset to copy.
Step 5: Treat feedback at the correct point in the signal path
When one frequency starts to ring, first identify which loudspeaker mix is creating the loop.
If the feedback is coming from a stage monitor, correct it on that monitor bus or output EQ. If it is coming from the main PA, investigate the main-system path. Repeatedly carving the vocal channel can damage the sound everywhere while failing to address the loudspeaker mix that is actually feeding back.
Use an RTA or spectrum display as a clue, then confirm the frequency by listening. Apply the smallest cut that restores stability. If you need many deep cuts, stop and revisit microphone placement, monitor placement, stage volume, and system tuning.
Where should you make the correction?
- The vocal sounds muddy or harsh in every mix: Start with the vocal channel EQ.
- One stage monitor rings, but the house mix is stable: Make the corrective cut on that monitor bus or output.
- The main PA rings, but the monitors are stable: Investigate the main-system path, placement, and system EQ.
- A headset needs different processing for the stage and audience: Use separate processing channels for the monitor and house paths.
- Several frequencies need deep cuts: Stop cutting and recheck placement, gain structure, stage volume, open microphones, and system tuning.
My X32 monitor ring-out workflow with graphic EQ
In my X32 monitor ring-out demonstration on YouTube, I control feedback in the monitor path instead of removing tone from the vocal channel everywhere.
The signal path is:
Microphone → X32 input channel → monitor send → monitor bus → inserted Dual Graphic EQ → stage-monitor output → wedge
Here is the workflow shown in the video:
- Choose the monitor bus you are tuning. In my example, I use Bus 9 for my mono stage monitor.
- Load a Dual Graphic EQ into an unused insert-capable FX slot. I use FX 7 in the demonstration.
- Insert that GEQ on the monitor bus and make sure the insert is enabled.
- Open the same GEQ in the connected remote-control app and enable the RTA display.
- Start with the monitor level low. Raise it slowly until a frequency begins to ring.
- Use the RTA to help locate the frequency, confirm it by listening, and lower the matching GEQ band slowly.
- Repeat only as needed, using the smallest cuts that create useful stability.
Safety note: Keep the output low before starting, protect ears and speakers, and do not sustain feedback while searching for a band. Stop if the system becomes unstable.
At the end of my video, I hold the microphone close to the wedge to demonstrate the result I achieved in that room. This shows the result I achieved in that room, not a guarantee that every system will behave the same way. It is not a replacement for correct microphone and monitor placement.
The X32 screens and remote-app layout may look different depending on the firmware and app version, but the principle remains the same: make the corrective cut in the monitor path that is producing the feedback.
Step 6: Separate the stage and audience paths when one channel is not enough
Headset microphones can be especially difficult when the person on stage wants more of their voice in the monitor than the front-of-house mix can safely or comfortably use.
In my WING split-channel demonstration on Instagram, I assign the same headset source to two processing channels.
This is especially useful when one console is handling both front-of-house and stage monitors and you do not have a separate monitor console or monitor engineer. One operator can keep independent processing and level control for the room and the stage without needing two consoles.
I assign the same headset source to two processing channels:
- P. HS MONITOR feeds only the pastor's stage-monitor path.
- P. HS HOUSE feeds only the main front-of-house path for the audience.
The signal path is:
Pastor's headset source → P. HS MONITOR channel → monitor bus only → stage monitor
The same headset source → P. HS HOUSE channel → main mix only → audience PA
This works naturally with the WING's source-based architecture. One physical source can feed more than one channel, while each channel has its own processing, fader, sends, and destination assignments. The physical preamp remains shared, so set it carefully and remember that changing it affects both channels.
The advantage is control. You can tune the monitor channel for stage stability and intelligibility while processing the house channel for the audience. A house-fader change does not have to change the pastor's monitor level, and a monitor adjustment does not have to change the house mix.
Label both channels clearly and verify the routing before use. The monitor channel should reach only its intended monitor path, and the house channel should reach only the intended main path. Accidentally sending both channels to the same destination can create excessive level, confusing controls, or phase problems.
After I stabilized the monitor, I also used the WING's PSE-545 Source Extractor on both channels as an optional way to tighten the signal. It is a gate-style processor, not a feedback eliminator. Set it by listening, and do not use it as a substitute for headset placement, monitor placement, gain structure, or ringing out the monitor path.
WING screens and processor locations can vary by firmware version. The routing concept matters more than copying a screenshot exactly.
When I use the split-channel method
I use this method when one source has two genuinely different jobs. The stage path may need more stability and intelligibility, while the audience path may need a more natural tone and different dynamics. If both destinations can use the same processing and level relationship, one channel is simpler. I do not duplicate a channel just because the console allows it.
Routing check: Before the service, mute one split channel at a time and confirm exactly which destination disappears. That quick test catches accidental double-routing before it becomes a level or phase problem.
Step 7: Add clarity carefully
After subtractive EQ, decide whether the vocal still needs more presence or brightness. Small boosts can help a vocal speak through a busy mix, but boosting a frequency also reduces your margin if that area is already close to feedback.
Before boosting, ask two questions:
- Is another instrument masking the vocal?
- Would cutting that competing instrument create space more naturally?
The clearest vocal is not always the brightest vocal. A harsh vocal may feel loud when soloed but become tiring and difficult to understand during a full service.
Step 8: Add compression after the vocal is stable
Compression can control level changes and help the vocal remain consistent, but it does not fix the acoustic feedback path. Set gain and EQ first.
Start with gentle compression that catches louder phrases rather than holding the vocal down constantly. Listen for reduced clarity, increased stage noise, and sudden level changes when the singer moves closer to or farther from the microphone.
Be careful with makeup gain. Raising the output after compression can use some of the gain-before-feedback margin you just created.
After adding compression, recheck the vocal through both the main PA and monitors at full performance level.
A quick live-vocal EQ checklist
Before the event begins, confirm the following:
- The correct microphone is patched and labeled.
- The singer is using realistic performance level and microphone technique.
- The main PA and monitors are positioned appropriately for the microphone.
- Input gain is healthy and leaves headroom.
- The high-pass filter removes noise without thinning the voice.
- EQ changes are small and solve problems you can actually hear.
- Feedback cuts are applied to the loudspeaker mix creating the loop.
- Each monitor is checked carefully at a realistic operating level.
- Split stage and house channels, when used, reach only their intended destinations.
- Compression controls peaks without flattening the vocal.
- The vocal remains stable when the full band plays.
- Unused microphones are muted.
For a repeatable pre-service process, download the free FOH Pre-Service Checklist.
Common mistakes that make feedback worse
Copying exact EQ settings from another singer
A preset can be a starting point, but it cannot account for your singer, microphone, room, PA, monitors, and stage volume. Listen first and keep only the settings that solve a problem in your system.
Boosting before the physical setup is stable
Adding presence or brightness may push a resonant area closer to feedback. Fix microphone technique, loudspeaker placement, gain, and unnecessary open microphones before reaching for more boost.
Using the vocal-channel EQ to repair a monitor problem
That changes the vocal in every destination receiving the channel. When the loop exists in one monitor mix, make the narrow corrective cut in that monitor path whenever possible.
Making too many deep EQ cuts
If the EQ curve looks like a row of deep notches, the underlying problem may be placement, stage volume, room acoustics, or system tuning. Stop cutting and diagnose the complete path.
Changing preamp gain after building the monitor mixes
On many consoles, a preamp change affects every mix receiving that input. If you must change it, recheck the monitors and front-of-house mix afterward.
Routing both split channels to the same destination
The split-channel method only creates useful separation when each channel has a clear job. If both channels feed the same monitor or main mix, you can create unexpected level changes and make troubleshooting harder. Label the channels and verify every bus and main assignment.
Frequently asked questions
Can EQ eliminate feedback completely?
No. EQ can improve stability at specific frequencies, but the system still has a physical gain limit. Microphone distance, loudspeaker placement, room acoustics, stage volume, and open microphones remain part of the feedback loop.
Should I use a graphic EQ or parametric EQ for feedback?
A parametric EQ provides precise control over frequency, bandwidth, and cut depth. A graphic EQ is useful on a system or monitor output when you need quick access to fixed frequency bands, as shown in my X32 workflow. Use the tool available and make the smallest correction that works.
Should I ring out every monitor?
Check every monitor at realistic operating level before the event. A controlled ring-out can reveal unstable frequencies, but aggressive ringing can produce an unnatural monitor mix and does not replace proper placement or system tuning.
Why does feedback return when the full band starts?
The singer may ask for more monitor level, stage volume may increase, more microphones may be opened, or performers may move the microphones and monitors. Soundcheck the complete system at realistic level and recheck after major stage changes.
What frequency should I cut when a vocal feeds back?
There is no single vocal-feedback frequency. The unstable frequency depends on the microphone, loudspeaker, placement, room, processing, and level. Use an RTA as a clue, confirm the frequency by listening, and cut only the path that is creating the loop.
Will assigning one WING source to two channels cause phase problems?
The assignment itself is not automatically a phase problem. The risk appears when both processed channels reach the same destination with different timing, polarity, or processing. Keep the stage and house destinations separate, label them clearly, and verify the routing by muting one channel at a time.
Keep building your EQ confidence
The goal is not to memorize one vocal preset. The goal is to follow the same decision process every time: physical setup, gain, high-pass filtering, subtractive EQ, targeted feedback control, careful tone shaping, compression, and a full-band check.
If you want a beginner-friendly walkthrough of EQ, frequency ranges, gain structure, and practical listening decisions, explore the EQ Made Simple E-book.
Continue learning
- Download the free FOH Pre-Service Checklist for a repeatable setup process.
- Browse Markex Recommended Gear for practical microphone, console, monitoring, and live-production recommendations.
- Use The Sound Engineer's Dictionary E-book when unfamiliar terminology slows down your learning.
About the author
I am Tobi Mark, founder of Markex Productions. I teach beginner and intermediate sound engineers how to replace trial and error with a clear process they can use during real services and events. Learn more about me and Markex Productions.
Technical references
Get practical live-sound tips from Markex
Join the Markex newsletter for clear, useful mixing guidance you can apply during real services and events.
No spam. Unsubscribe anytime.